Rigging at Home Series #2: Rated Gear and Its Applications
Written by Morgan Louvier, Co-Owner of Momentum Aerial
We get a lot of questions from our student body about purchasing gear; especially now that the studio is temporarily closed due to COVID-19. Where should I buy the right type of aerial equipment? What’s a rescue 8? Can I buy equipment from Home Depot? How strong does my gear need to be? There’s so much gear out there, and it’s my mission to educate our aerial community on safety and proper gear usage! Please keep in mind, reading this article is not a substitute for taking a class on rigging or consulting a professional aerial rigger. Please reach out to us at Momentum Aerial or your local studio, and we can help explain and answer your questions in person. Don’t rig on your own! This article is intended for you to make educated decisions about rigging outside of the studio, and how you risk your body in aerial. Not everyone is ready for a home set up, reference our 1st blog post about how to determine if you’re ready to train at home.
Disclaimer: Momentum Aerial or any of its instructors is not responsible for what you do in your own home. You are taking on your own risk and liability by rigging and training at home.
Bio
Hi, I’m Morgan, and I’ll be guiding you through this blog post on aerial equipment and how to use it. I’ve been a trapeze artist for 13 years, 6 years on the flying trapeze, and 7 years on static trapeze. I’m an avid climber, whitewater boater and aerialist! I’m a certified Swift Water Rescue Professional (Sierra Rescue) and a Wilderness First Responder (Remote Rescue). I have 7 years of informal training with rope access systems in climbing and aerial applications, and a wealth of knowledge to share! For any questions I can’t answer, I always consult with our network of certified Rope Access Technicians (SPRAT), who we regularly work with for student showcase and professional aerial rigging. Let’s get started!
WLL vs MBS
Carabiners, swivels and other aerial equipment are meant to take this dynamic load, but they can only withstand so much. The WLL, or working load limit, is the manufacturers recommended force the piece of gear can safely take. The MBS, or minimum breaking strength is what the gear will actually fail at. A piece of gear may be able to hold up to 9,000 lbs, but that’s what it will break at. The WLL generally is about 1/3 of the breaking strength. So, if the gear is rated for 9,000 lbs, its working load should not exceed 3,000 lbs. It’s important to work only within the WLL, as recommended by the manufacturer, in order to not overload your gear and cause catastrophic failure and injury.
Equipment Stamps and What They Mean
All reputable equipment will have rating and a certification stamped on it. If a piece of gear has no markings on it, do not trust it; it didn’t come from a reputable manufacturer and may fail. Make it a keychain or a decoration with it instead! Many quick links, carabiners and other “gear” sold at Home Depot, IKEA or other home improvement stores DO NOT have stamps or ratings and cannot be use in aerial applications. Your life is literally on the line, please buy gear only from reputable companies including, but not limited to:
Black Diamond
Petzl
Omega Pacific
Aerial Essentials
Rock Exotica
Lift All Tuflex (for slings and spansets)
CE and UIAA Stamp
You’ll find these stamps on all equipment that you can trust. They’re stamp used by reputable manufacturers that certifies the equipment to be safe for climbing, mountaineering and human load. Some gear will have one or both of these stamps. DO NOT use gear unless it has at least one of these certifications.

kN Ratings
kN stands for kiloNewton, a measure of force equal to about 225 lbs. KiloNewtons don’t have anything to do with “weight,” but have everything to do with dynamic force. A basic physics principle for dynamic force is: force is equal to mass times acceleration. The rating on a carabiner is its MBS, or minimum breaking strength. Check out this carabiner:

MBS of 24 kN properly loaded, MBS or 7 kN if side loaded

1st Image: properly loaded carabiner
2nd image: side loaded carabiner
3rd image: tri-loaded carabiner
Off-Axis Loading
Side Loading (BAD!)
This carabiner above has a MBS of 24 kN along it’s spine, and a MBS of 7 kN if it’s side-loaded. Side-loading a carabiner significantly decreases the load it’s able to hold. This particular carabiner’s load capacity has been reduced by about 70%. The diagram above on the right shows how a carabiner should be loaded. NEVER side load carabiners, they’re not designed to be strong in that direction.
Tri-Loading and Quad Loading (reduced load capacity)
We’re going to get real in-depth and nerdy for a minute. Black Diamond lab tested loading carabiners in different ways, to see how much strength was lost outside of the normal configuration. Look at how much strength is reduced by loading carabiners in multiple directions. This stuff is fascinating! Check out the full scope of the BD Off-Axis Loading Test.

Correct orientation of a carabiner

Tri-loaded carabiner: reduces strength by about 20% in scenario 1, and not much in scenario 2

Quad-loaded carabiner: reduces strength by about 25%
Gear Strength for Aerial Forces
A 100 lb aerialist can generate up to 1000 lbs of force in a drop on nearly any aerial apparatus. Even if you’re not doing drops, the dynamic forces you create can be substantially more than your body weight. Let’s er on the safe side, and go with the maximum amount of force generated: 1000 lbs, or about 4.5 kN. That is our WLL. The ratio of strength needed for aerial rigging and equipment is at least a 5:1, preferably upwards of 8:1 or 10:1. This means your rigging point should be able to hold at least 5,000 lbs, or 22.22 kN of force. Remember our carabiner from before? It can be safely used for aerial!
Another way to think about this: would you hang a car from your aerial point? The average car weighs nearly 3,000 lbs. If we want our aerial point to hold at least 5,000 lbs, you should feel comfortable (hypothetically) hanging a car from your aerial point.
What gear can we safely use for aerial applications?
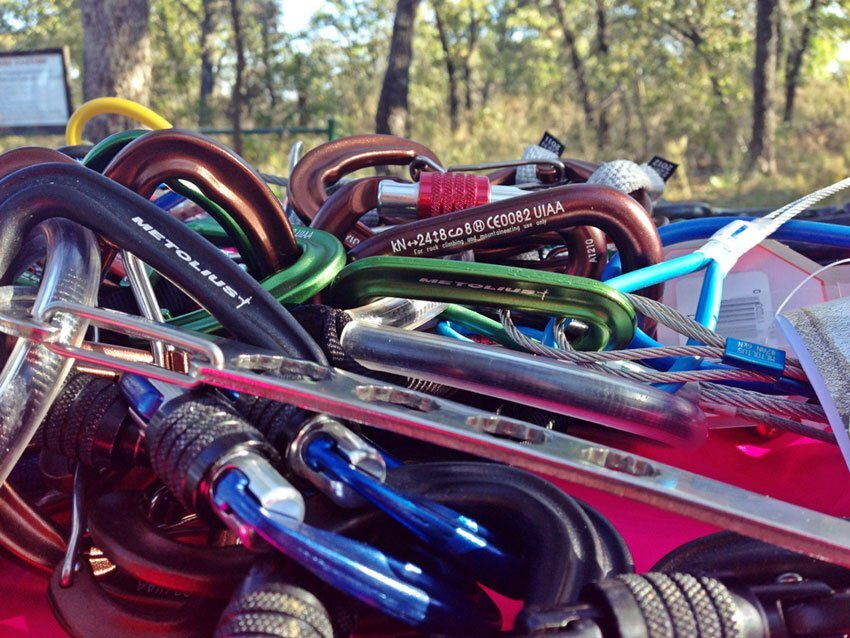
We can use a lot of climbing gear and industrial lifting gear for aerial rigging. As long as we try to keep within a safe WLL of 1,000 lbs or 4.5 kN, and an MBS of 5,000 lbs or 22.22 kN, any certified gear that meets that requirement is good to go. We have hardware (carabiners, rescue 8s, shackles, swivels) and software or soft gear (round slings, spansets, webbing, rope). Below are some images of what each of these looks like, with their applications:
Hardware

Locking Carabiner: used to connect 2 pieces of gear together. Never use non-locking carabiners!

Shackle: used to connect 2 pieces of gear together, but unlike a carabiner, can be tri-loaded! Must be “moused” to prevent the pin from coming out with a zip tie or wire

Swivel: to spin! Can be used for all apparatuses

Rescue 8: Used almost exclusively for silks. Silks are woven through in a 4 leaf clover pattern. See a how-to video here, and ask us if you need help.
Soft Gear

Spanset: (otherwise known as a round sling) is used as an anchor around a beam. It has a tough exterior which protects the interior weight bearing cord. Spansets can also be used as an extension to lower an apparatus, or as the main hang point of a lyra. Never remove the tag from a spanset. Do not hitch multiple spansets together. Use carabiners instead.

Webbing Sling: used as an extension to lower an apparatus. It’s made out of tubular webbing with a water knot. Do not hitch multiple webbing slings together. Tie new knots or use carabiners instead.

Rope Sling: used as an extension to lower an apparatus. It’s made out of rated climbing rope and knotted with a double fisherman’s knot. Do not hitch multiple rope slings together, tie new knots or use carabiners instead.
Soft Gear and Anchor Points
Soft Gear and Proper Hitches
The diagram to the right displays a variety of ways to rig soft gear as anchors. Moving from left to right, I’ll explain each figure:
Fig. 1: the sling or spanset is looped over, then tied to form the sling. Its rating is 22kN, and it is merely hanging from the beam, so its strength stays at 22 kN.
Fig. 2: the sling or spanset is in a basket hitch. As a sling, it’s looped over the beam once, which doubles the sling. This also doubles its strength: 22kN x2 = 44kN. This is an awesome anchor! For hard gear, it is best to use a shackle instead of a carabiner (tri-loading reduces strength).
Fig. 3: the sling or spanset is basketed TWICE, but each part of the sling is hanging down. This creates 3 loops for the hardware to hang from. This triples the sling and its strength: 22kN x3 = 66kN. A even more bomber anchor! It is definitely best to use a shackle instead of a carabiner in this instance (tri-loading reduces strength).
Fig 4. the sling or spanset is basketed 3 times around the beam, but only each end is looped to the hardware. This is the same strength as Fig. 2 (44kN), but raises the point up a little. This could be used if you need more height.
Fig 5. the sling or spanset is in a choker hitch, and is looped through itself with only one loop hanging down. A chocker hitch load capacity is cut in half, 22 kN /2 = 11kN, because of the pressure put on the sling by looping it through itself. This hitch is not a recommended rigging style because of the significant strength reduction.

Horizontal Forces in Anchor Points
Let’s say you don’t have an anchor point or a beam directly where you want to hang your apparatus, but there are 2 beams with a 5 foot span between them that are both adequate. Can you rig 2 points for your apparatus, one on each beam, and connect them in the middle? The answer is…maybe. Your bridle angle (the angle between 2 anchors) has to be correct. Check out the diagram to the right. For sake of consistency with the diagram, we’ll use kilograms. A 100 kg weight will not put 100 kg of force on the anchor points. As the angle between the points comes closer to 180 degrees, the force is magnified more and more. So, in the diagram at the maximum bridle angle, the 100 kg weight is putting 574 kg of force on EACH point. A full 180 degree span puts INFINITE amount of force on the anchor points. Scary!
It’s best to use small bridle angles, of 90 degrees or less. The smaller the angle, the less force each point has to hold.

The American Death Triangle
The American Death Triangle seems like it would be safe: a spanset is looped around a few beams or truss components, just like we’ve talked about. But remember from above, horizontal 180 degree bridle angles put an infinite magnification of force on the anchor points, and often cause them to fail. A better way to solve the scenario to the right is by using 2 spansets, one over each side of the truss to eliminate the horizontal component and strengthening the system.
Check out this in-depth article on the American Death Triangle by Over-The-Edge Rescue.

Carabiners
IMPORTANT NOTES ABOUT CARABINERS!
When rigging an aerial apparatus, we must only use locking carabiners. When put in dynamic situations, your apparatus can actually HOP OUT of non-locking carabiners. Terrifying. If pushed at the right angle, the gate can open and drop you, because the carabiner’s gate isn’t blocked from opening. That’s why we exclusively use locking carabiners for aerial applications. Check out this video detailing how that can happen:

There are a few types of locking carabiners: screw lock and auto-lock. Auto lock carabiners have a 2 part unlocking system (usually twist and pull down), and can be used right side up, or upside down. Screw lock carabiners MUST be flipped upside down to prevent them from slowly unscrewing themselves. Let gravity help you! A phrase I always use is “Screw it down before you screw it up!” Either type of locking carabiner is fine for aerial rigging, just be sure you know how to use each one safely.

Traditional auto locking carabiner (twist, then pull down)

Magnetic autolocking carabiner (disengage magnets by pinching)

Screw lock carabiner. Always have oriented as shown, upside down, to prevent it un-screwing itself.
Aluminum vs Steel Hardware and When to Retire Gear
At Momentum Aerial, we try to use as much steel gear as possible. Nearly all of our gear is steel (except for swivels) because it’s about twice as strong and wears significantly less than aluminum. Aluminum gear is just fine for aerial rigging, but needs to be checked often for wear, and needs to be replaced when the wear in the metal is more than 10% of the thickness of the piece. Wear can happen in any metal gear, but aluminum will wear much faster. The photo below is an excellent example of wear in aluminum carabiners, and these pieces of gear should definitely be retired:


Frequently check your soft gear for wear and tear. If your slings look like this, it’s time to retire them before they fail.
Equipment You Should NOT Use for Aerial Rigging
Chain
Chain is generally not rated, especially not for human load. Chain isn’t as flexible as round slings or spansets, and its hard angles can cause it to fail if even 1 chain link is loaded against a beam at a 90 degree angle.
Daisy Chains
Daisy chains look like this, and are not suitable for aerial rigging. The individual loops are not rated, and under dynamic force, can have a high failure rate. Daisy chains are manufactured for personal tethers in rock climbing, where a person’s weight is being supported temporarily while they aren’t moving on the wall. They’re meant for static weight, not dynamic force, and climbers almost always use TWO of them in conjunction with each other for redundancy, should one part of the system fail unexpectedly. Webbing slings or spansets can be used as extenders, and provide a much higher threshold of safety.
Paracord or Knock-off Ropes
If you google “aerial silks set up” or “aerial yoga set up,” you’ll see that often a thin piece of cord or rope is used to hang the apparatus. That cheap paracord or rope is not strong enough or durable enough to hold your dynamic weight. Do not trust things off of the internet, unless they’re from a reputable equipment manufacturer.
Aircraft Cable
While this CAN be used safely (and often is a crucial component of trapeze fabrication), there are a lot of better options for home rigging. Clamps that hold human load are hard to manufacture and put together at home, and you can have a much safer rig by using webbing or rope instead of air craft cable. It’s not a matter of how strong it is, it’s how it’s fabricated and utilized.
Any Gear from Hardware Stores
Gear from hardware stores is generally not rated, and is never rated for enough to hold a person. Don’t trust gear from Home Depot, Ikea or any other home improvement store. This includes ceiling hooks (screws with hooks on the end), quick links and carabiners.
Some Gear From Amazon
Much of the gear for “aerial set ups” is inadequate for actual aerial use. Ceiling mounts are not rated for aerial points, and are only held in place by screws into a stud. Would you hang a car from that? Do your research, and always look at everything sold on Amazon carefully. Ask us if you have questions!
Examples of Proper Equipment Usage in Aerial Rigging

Properly rated locking carabiners, swivel and rescue 8 set up.

A spanset is basketed around a load bearing beam, maximizing strength. Attached is a properly moused (zip tied) and tri-loaded shackle. A carabiner would have been unsafe here, because it reduces its load capacity when tri-loaded. The only things that could be added to this set up is a swivel and another locking carabiner to allow for spinning.
Improper and Dangerous Equipment Usage

There are 3 things wrong in this photo. While webbing slings and locking carabiners are rated for aerial applications, they are being use improperly here.
1. Webbing should be used as an extension, not an anchor. Instead of the webbing, a spanset should be used, because it’s more resistant to wear and tear from the corners of the beam.
2. A carabiner is not meant to be tri-loaded, by holding two sides of the webbing together. A shackle is a better piece of hardware to use in this scenario.
3. The silk should not be rigged directly to a carabiner. By placing load on the gate, it’s effectively side loading the carabiner, and reduces its strength by 70%. Also, the wear on the silks will cause them to rip faster. The silks should be rigged on a rescue 8.

There is one MASSIVE thing wrong with this photo. Remember back to our anchor forces section: this set up has nearly a 180 degree angle between the anchor points. This magnifies the force by over 500%, and is not safe. A 100 lb aerialist just sitting on this set up will put 500 lbs of force on EACH railing. A 100 lb aerialist doing a drop will put up to 5,000 lbs of force on EACH railing. Spooky! On top of the unsafe bridle angle, railings are not adequate anchor points.

There are 2 things wrong in this photo.
1. Daisy chains (the piece of gear looped around the beam) are not meant to be used for aerial. The individual loops are not rated. A spanset would be a better anchor in this scenario.
2. The carabiner should not be tri-loaded. Instead of a carabiner, a shackle should be used.

There are 4 things wrong in this photo, let’s work from the top down.
1. Pipe is not adequate for human load. A better solution is a structural beam or a portable aerial rig.
2. Never use chain for aerial. A spanset is a better anchor.
3. The carabiner is non locking and tri-loaded. A shackle is a better piece of gear in this scenario.
4. I’m not sure what the red pieces are connecting the sling to the lyra, but spansets are a better, more trustworthy piece of gear for this application. If you don’t know what it is, don’t trust it.
That’s So Much Information!
As you can see, most of the time aerial rigging is not simple. A lot of math and engineering go into force calculations, gear certifications and determining what can safely hold your body’s force in the air. Please reach out to me, Morgan, or other reputable aerial riggers if you have questions or need help. There are a lot of knowledgeable resources out there, don’t just '“YouTube” things! Consider joining a few Facebook groups focused on aerial safety: Safety in Aerial Arts and Circus and Aerial Safety. There’s a wealth of information in those groups that you can search! Remember, the best way to learn about aerial rigging is to apprentice with an aerial rigger, or take classes in aerial rigging.
Other Rigging Resources
Introduction to Aerial Rigging by Steven Santos
Aerial Rigging Classes with Delbert Hall
Aerial Rigging Classes with Brett Copes
SPRAT (Society of Professional Rope Access Technicians) - get certified!